User Guide: Work Order Integration with REVEAL Field App
The purpose of this user guide is to step you through the process of integrating work orders/stops to be sent to your driver’s REVEAL Field App.
This solution requires the following:
· Ability to integrate 3rd party solution with REVEAL for the purpose of sending stops or work orders
· Ability to configure REVEAL account so that drivers all have access to the REVEAL Field App – available on Android and iOS
The user guide steps outlined here is to make this process as streamlined as possible, but work order integrations that intend to leverage the Field App can be created or customized in more in-depth ways depending on the business case trying to be solved.
Getting Started Checklist
1. Review the Integration Manager portal to familiarize yourself with the process to create and APP and review the APIs needed for this project.
2. Visit the Integration Manager’s Help center to review the code sample options available, including POST Work Order which will be required for this integration.
3. Request to have your APP upgraded to include the Planning and Scheduling APIs needed to create a work order integration by contacting Customer Support or your Customer Experience Account Manager.
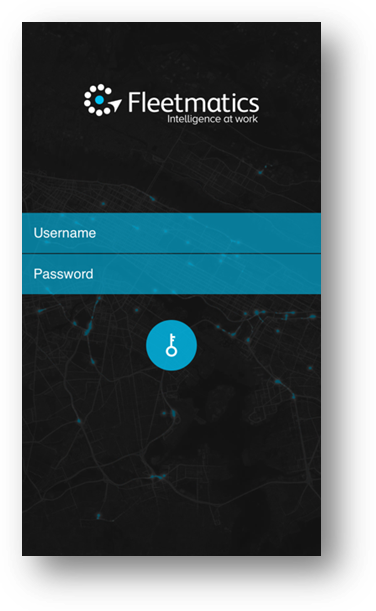
4. Download the Field App on your Android or iOS device for testing purposes.
5. Ensure the REVEAL account has a test Driver created for testing purposes. Visit the REVEAL Appendix for information on how to create a Driver in REVEAL account.
6. Start your integration…
Integration Manager Steps
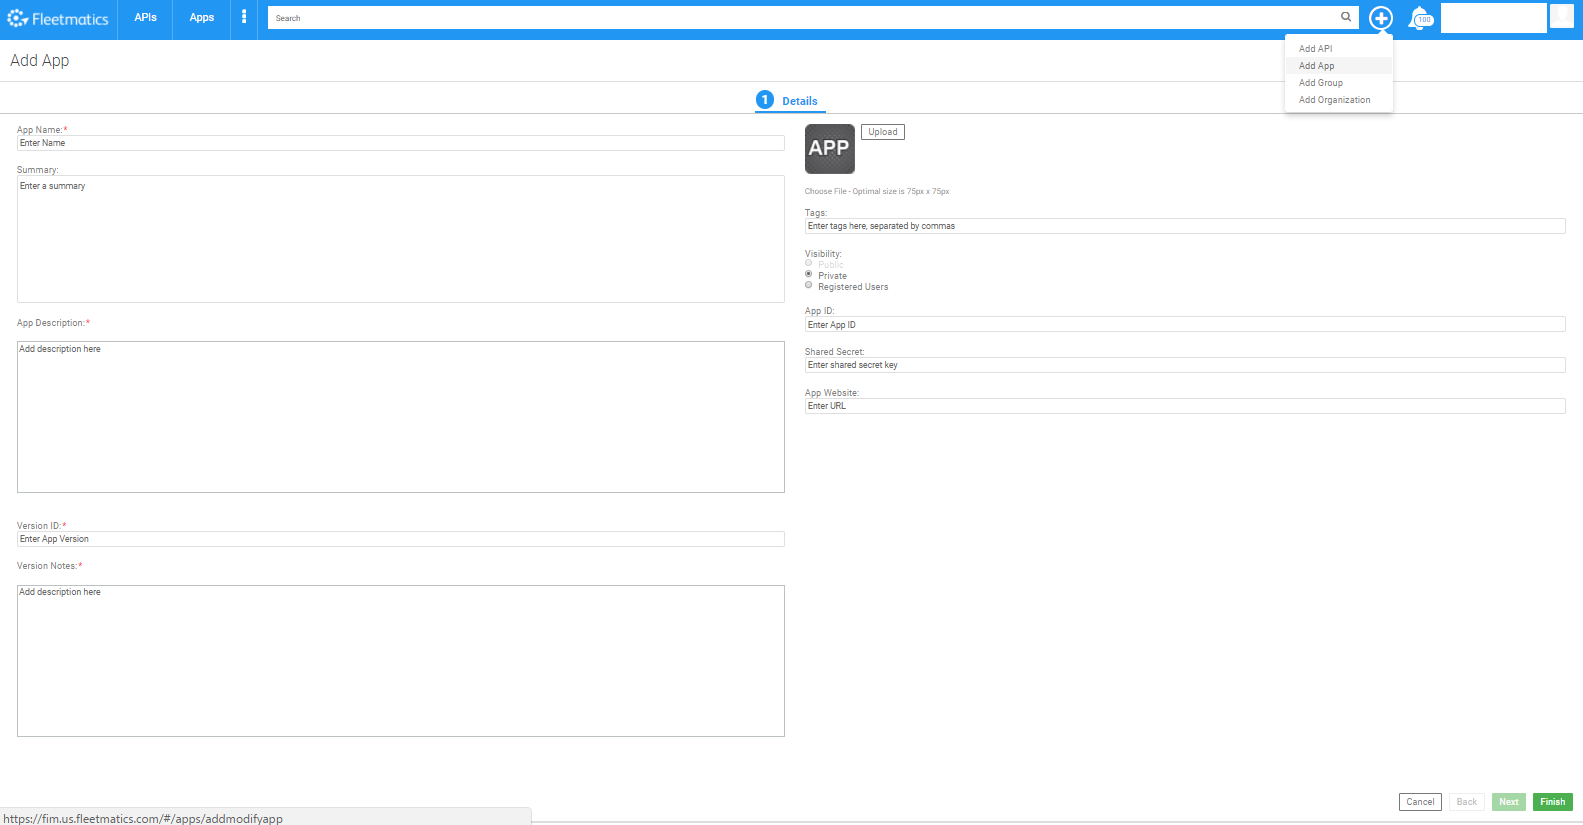
Creating an App
Once you have logged into the Integration Manager, you will
need to create an APP. This can be
completed by selecting the  in the top navigation
menu and selecting “Add App.”
in the top navigation
menu and selecting “Add App.”
To register an App is simple.
1. Provide an App Name – make sure it is something easy for REVEAL support members to easily associate with your organization for future troubleshooting and assistance.
2. Providing an App Summary is optional.
3. App Description is mandatory and can be used as a reminder for the app’s purpose for both you as well as REVEAL support members.
4. Version ID
5. Version Notes
6. Set your visibility to PRIVATE to ensure only you and REVEAL support can see your APP within the integration manager App list.
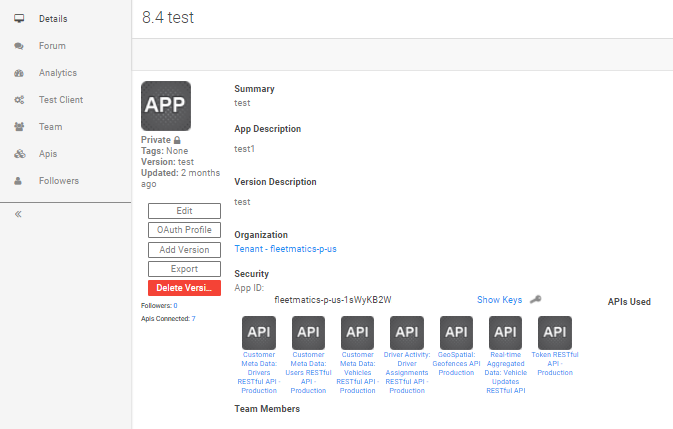
Getting your APP ID
Each APP created within the integration manager will generate a unique APP ID that is required to be provided with the Authorization header of your API calls, except for the Token request authorization.
After creating your APP, go to DETAILS to see the Security App ID created:
Once you have successfully registered your APP, please notify Customer Support to provide the name of your APP to have it upgraded to access the Planning & Scheduling APIs. Please note the Planning & Scheduling APIs are part of the premium API services offered. As long as this was discussed as part of your integration plans, the turnaround time to have your App upgraded should move very quickly
Integration Process
To create the work order integration with the REVEAL Field App there are several API methods that will require programming. While you wait for your App to be upgraded with the Planning & Scheduling APIs, you can get started on the Token API.
We recommend that you first explore the APIs using the APP’s Test Client within the integration manager.
Select your App, by finding it through “Apps” or by selecting your Avatar in the top-right hand corner of the integration manager primary navigation menu and then selecting “My Apps” from the dropdown shown:

Once inside of your App, select TEST CLIENT from the left-hand sidebar menu.
Token API
Before writing to any of the other REST APIs in the suite, the Token API must first be successfully called to retrieve a valid token to make subsequent calls. Tokens expire every 20 minutes and therefore it is best to plan for managing programmatic detection to either:
1. Call for a new token every “x” minutes under 20 minutes; or,
2. Call for a new token every time a 400 error code is received in a response to initiate a new token request.
Before working with the Token API, please make sure you are reviewing the following documentation/resources:
|
Resource |
|
|
Token API Documentation |
· Token RESTful API - Production |
|
RAML |
Under the documentation link, there is also a download file available for the RAML which is similar to a WSDL but for REST APIs. The RAML will provide pertinent information regarding the URLs and objects within the API. |
|
Help – sample code |
|
Key steps for getting started with the Token API:
1. Content-Type and Accept headers should be set to “text/plain.” All other APIs will require “application/json” or “application/xml.”
2. Authorization header must include a Base64 encrypted REST username and password to be provided.
a. The REST username and password is linked to the REVEAL account – it is not the same credentials used to access the integration manager.
b. The App ID is not required in the Authorization when calling for a Token.
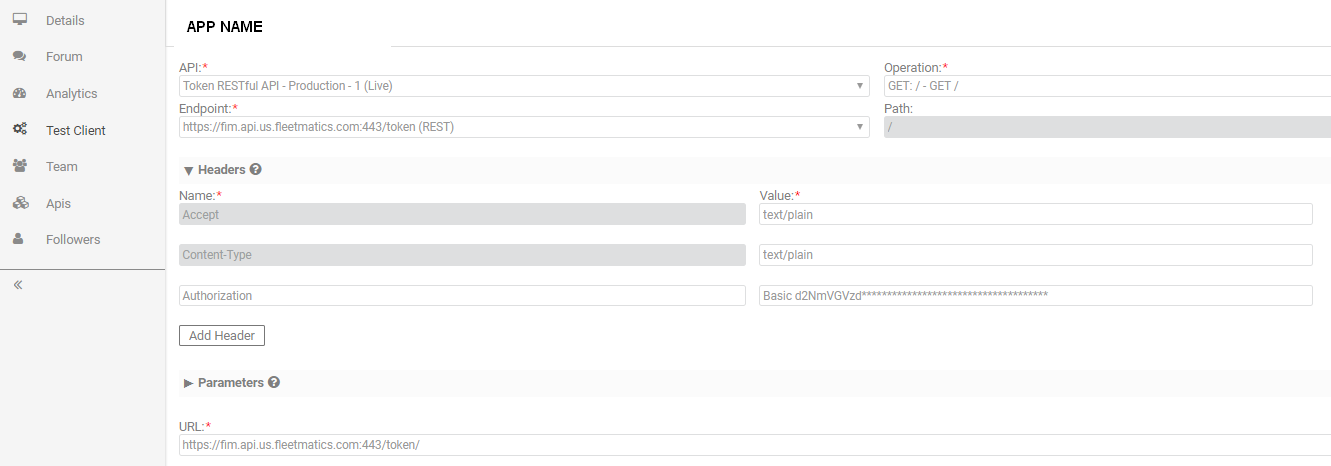
When setting up the Test Client to call the Token API, it should be configured as follows:
Work Order Integration
Although the Field App will display and call everything “Stops,” what is actually being shown within the Field App in context of REVEAL is a work order object.
Therefore, it is important to become familiar with the following documentation/resources:
|
Resource |
|
|
Planning & Scheduling Work Order API This API is used to create the actual work order stop information. |
· Planning and Scheduling: WorkOrders RESTful API - Production Within the above documentation, the Planning & Scheduling Status and Type API information are also detailed. When creating work orders, status and types are mandatory fields to be included. However, if you do not wish to manage a lot of status or types for your integration, the steps shown below will include ways to bypass coding to these API methods to simplify your integration. |
|
RAML |
Under the documentation link, there is also a download file available for the RAML which is similar to a WSDL but for REST APIs. The RAML will provide pertinent information regarding the URLs and objects within the API. |
|
Help – sample code |
|
Before Creating a Work Order – Plan for Status and Types
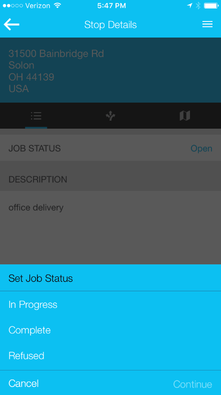
Work Order Status – is used to update a work order object with the lifecycle activity, i.e. Open, In Progress, Completed, or Cancelled are common work order statuses used.
If you only plan to status work orders using the functionality available on the Field App then the following statuses are the only ones provided to the driver within the Field App: Open, In Progress, Complete, and Refused.
To check Work Order Statuses available within your REVEAL account:
1. Go to ADMIN > Work Order Map Preferences to review the list of work order statuses; or,
2. Within the Test Client call the GET Work Order Statuses to return the list.
All work orders created via the API should be created with an OPEN status. As long as your REVEAL account includes the OPEN status by default nothing should be required to get started with assigning the OPEN status when calling to POST Work Order.
Work Order Types – is used to identify a particular type of work or service related to the work order, i.e. service call, troubleshoot, replacement call, etc.
If you do not plan on categorizing work orders and maintaining work order types for your business, you will only need to have one go-to work order type to apply it to the work order object upon creation.
To check Work Order Types available within your REVEAL account:
1. Go to Admin > Work Order Map Preferences to review the list of work order types; or,
2. Within the Test Client call the GET Work Order Types to return the list.
If no Work Order Types are listed within your REVEAL account, it is easy to manually add one using the Test Client, POST Work Order Type method.
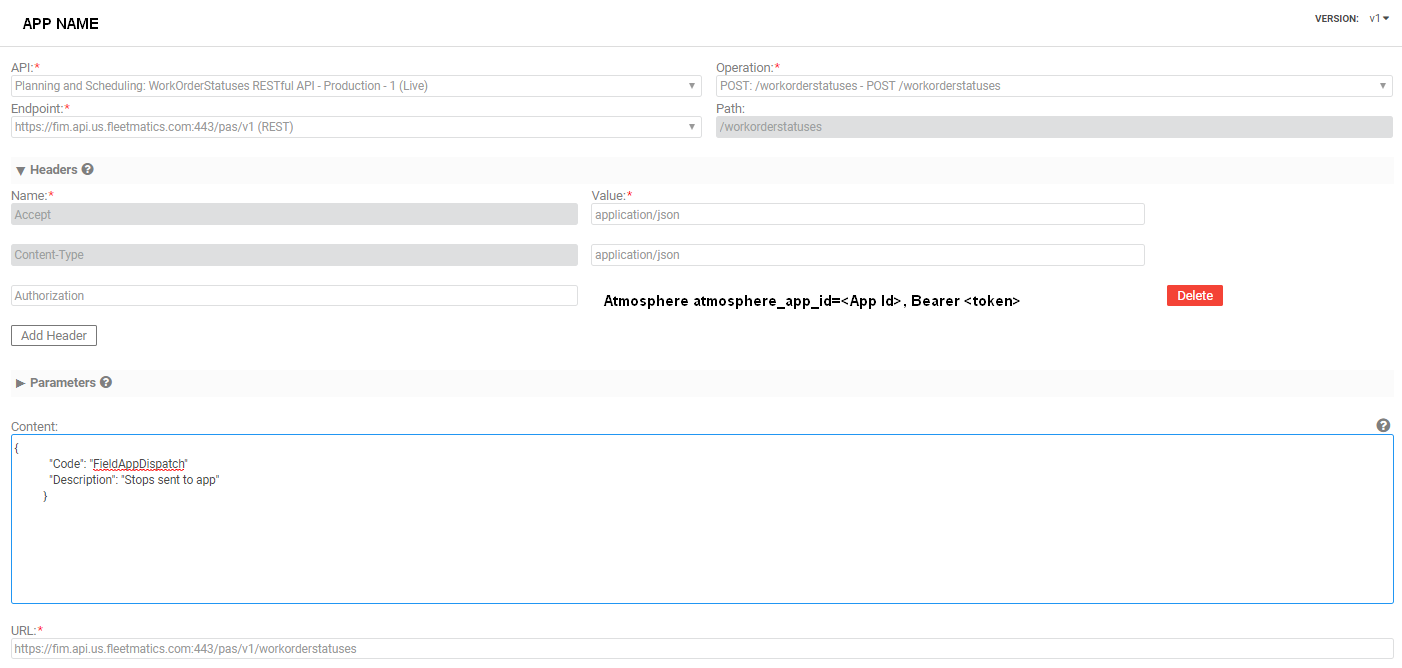
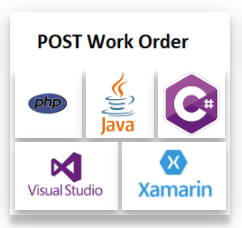
POST Work Order
After you have your plan for managing how you plan to provide the work order status and work order type within the work order object, you can begin working on POSTing Work Orders.
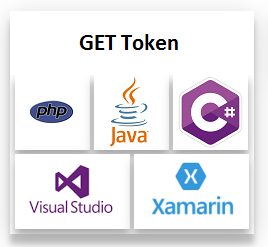
In the resources above, please make sure you review the documentation for the object and field definitions. Additionally, review the interactive Help section of the integration manage for sample code in Java, PHP, and C# if that works for your coding needs.
When creating a work order, the following concepts are important to keep in mind:
1. Work orders must include a unique work order number that cannot contain special characters such as colons or semicolons. Only alphanumeric values.
2. The Scheduled Date of the work order is critical as the Field App will only display work orders for current day and “yesterday’s” work orders in History.
3. The Schedule Date can be modified if needed due to work order changes by calling a PUT Work Order to change an existing work order or this can be managed through the Driver Dispatch window of the REVEAL UI.
4. The work order must be assigned to a driver in order for it to be received on the driver’s Field App display.
a. Assigning a work order to a driver means the Driver Number field must be filled out in REVEAL and that is what is used to apply a driver to the work order.
SAMPLE Request Message Body:
{
"ActualDateUtc": null,
"ActualDurationSeconds": null,
"Address": {
"AddressLine1": “31500 Bainbridge Road”,
"AddressLine2": null,
"Locality": “Solon”,
"AdministrativeArea": “Ohio”,
"PostalCode": “44139”,
"Country": “USA”,
},
"ClientCustomerId": null,
"Description": null,
"DriverNumber": “1122”
"Latitude": null,
"Longitude": null,
"OnSiteDurationSeconds": 0,
"RadiusInKm": “0.322”,
"ScheduledDateUtc": “2017-01-12T00:00:00",
"ScheduledDurationSeconds": null,
"StatusChangeDateUtc": null,
"WorkOrderNumber": “WO123”
"WorkOrderStatusCode": “Open”,
"WorkOrderTypeCode": “FieldAppDispatch”,
}
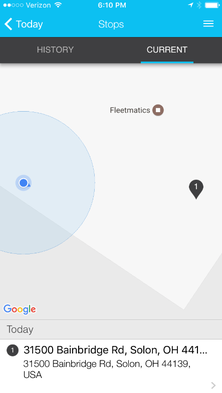
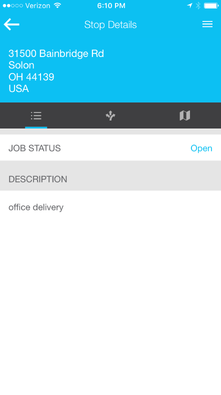
When the driver reviews current stops, provided the work orders created are for the driver’s current day, the following will display in the Field App:
REVEAL Appendix
Creating Drivers in REVEAL
Integration users have two options for how drivers can be created within the associated REVEAL account:
1. If your integration plans have factored in programmatically managing drivers via the Customer Meta Data – Drivers API then the integration user can POST and PUT drivers in the associated REVEAL account.
2. If your integration plans do not include driver management long-term, the drivers will need to be created using the REVEAL UI.
a. Please note you will need a REVEAL user login to create drivers – the REST credentials issued will not allow you to access the UI.
Using option 2 with a valid REVEAL credential, creating or
editing a driver profile requires logging in and navigating to the ADMIN page.
Select to CREATE DRIVER when creating a new driver. Or, select the DRIVER LIST and navigate or search
for an existing driver to be edited.
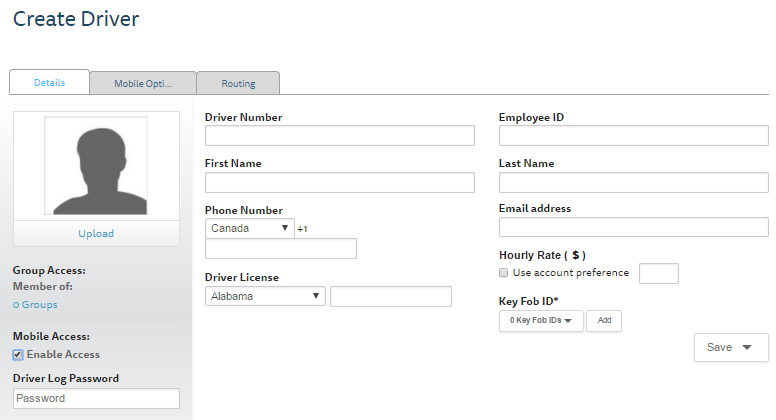
The Driver will need the MOBILE ACCESS option selected with a password that will be provided to the driver to access the App. Additionally, when Mobile Access is selected, the Email Address for the driver must be completed.
Additionally, the driver will need a unique Driver Number to be assigned to work orders created via the integration.
When the driver logs into the Field App, the email address entered will be his username and the Driver Log Password shown above will be the password.